

Before you start
You need mono canvas, a blunt tapestry needle, thread, stretcher bars, masking tape and a chart or painted canvas. For a first project choose 13 mesh. Pair it with a size 20 needle and thick thread: tapestry wool, pearl cotton #3, or 6 to 8 strands of DMC floss (stranded cotton).
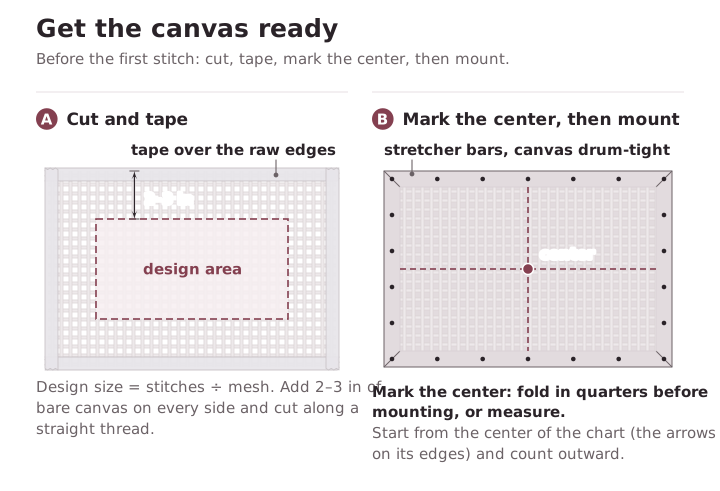
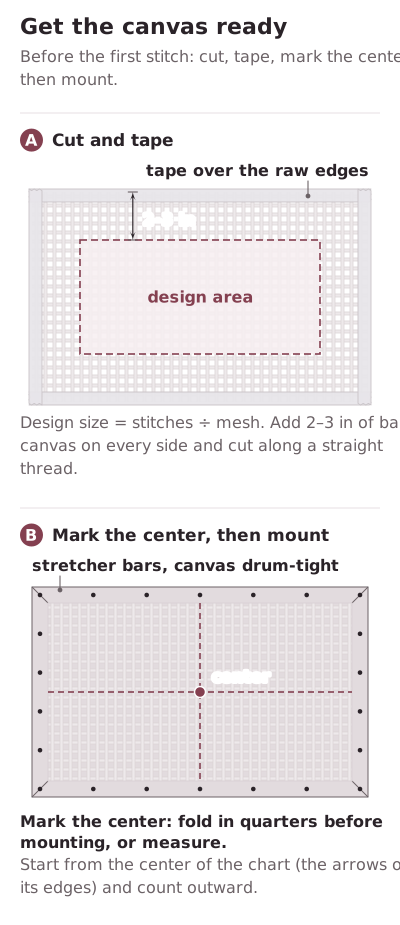
Work out the finished size first. Divide the chart's stitch count by the mesh. A 156-stitch-wide chart is 156 ÷ 13 = 12.0 inches wide on 13 mesh. Then add the margin on every side.
Continental vs basketweave in one minute
Both make the same tent stitch on the front. The difference is the path.
| Continental | Basketweave | |
|---|---|---|
| Direction | Horizontal or vertical rows | Diagonal rows, up and down |
| Best for | Outlines, letters, single rows, small shapes | Backgrounds and large areas |
| Canvas distortion | Pulls the canvas on the bias | Least distortion of the tent stitches |
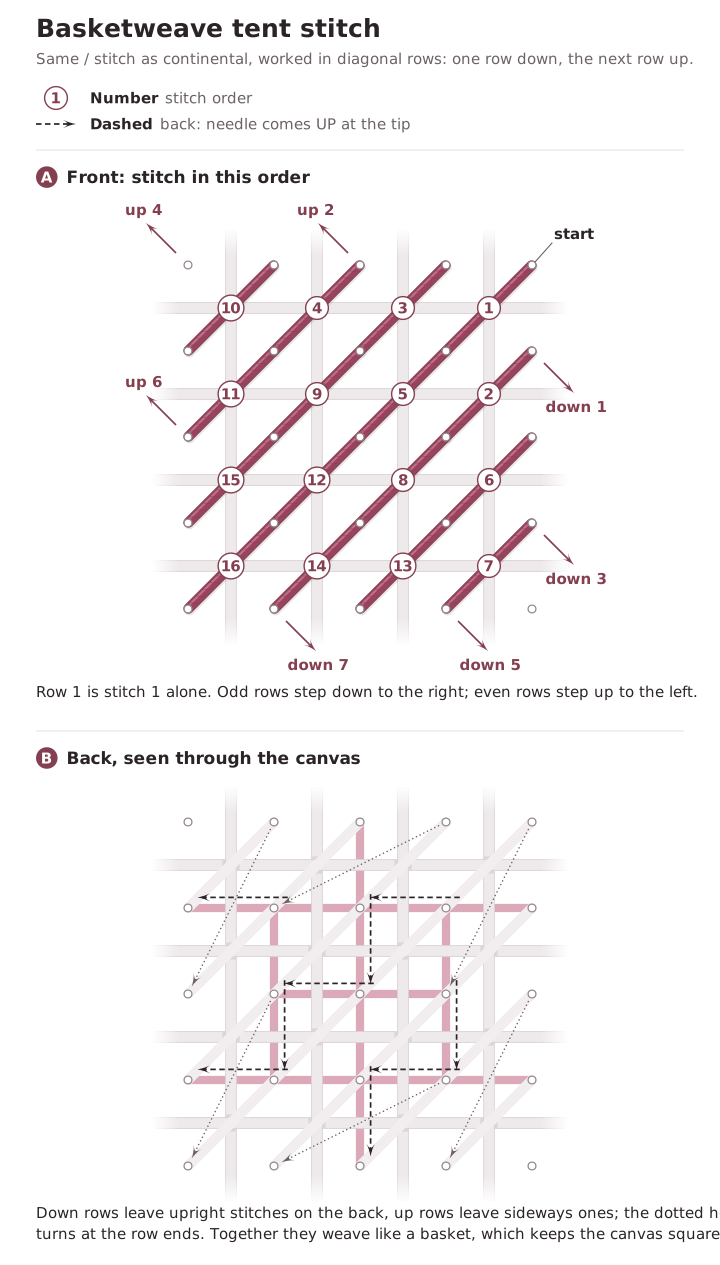
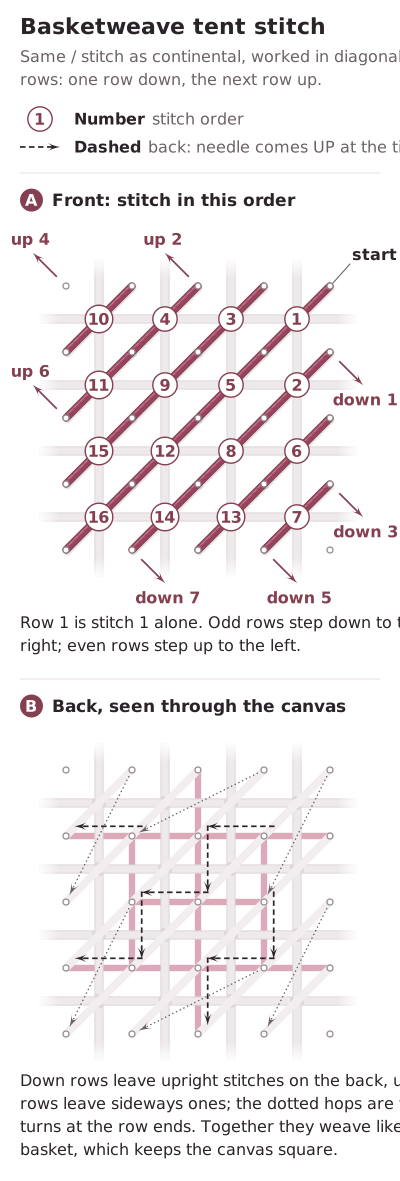
| Back | Long slanted stitches | Woven, basket-like grid |
More detail is in needlepoint stitches.
Common beginner mistakes
- Pulling too tight. The stitch should lie flat and cover the thread under it. Tight stitches show canvas and twist the piece.
- Mixing slant directions. Every tent stitch slants the same way, lower left to upper right.
- Knots on the back. They make lumps and can pull through. Use a waste knot and weave ends instead.
- Twisted thread. Let the needle hang and untwist every few stitches.
- Too little margin. Without 2 to 3 inches of bare canvas you cannot block or frame the piece.
Why start from a chart
A chart turns plain canvas into any design. One chart square is one tent stitch. You count across from the center and stitch the color shown. It costs only canvas and thread, so you can stitch a whole 26-building Christmas village from free charts instead of a hand-painted canvas, which often costs far more. See how to read a chart on canvas.
Step by step
- Cut the canvas Measure the design (stitches ÷ mesh) and add 2 to 3 inches on every side. Cut along a straight canvas thread.
- Tape the edges Fold masking tape or canvas tape over all four raw edges so they don't fray or snag your thread.
- Mark the center Fold the canvas in quarters or measure, and make a small dot at the center with a waterproof marker. Find the center of the chart too.
- Mount on stretcher bars Assemble two pairs of stretcher bars to the canvas size and tack the canvas on with the canvas threads straight. It should be drum-tight.
- Thread the needle Cut about 18 inches of thread. Fold the end over the needle, pinch the fold flat and push it through the eye. Separate floss strands and lay them back together for smoother coverage.
- Start with a waste knot Knot the end. From the front, push the needle down about 1 inch from where you will stitch, in the path of the row ahead. Stitch toward the knot so your stitches cover the tail on the back, then snip the knot off. With an even number of floss strands you can use a loop start instead.
- Work continental tent stitch Come up at the lower left of an intersection and go down at the upper right. Work right to left. At the end of a row turn the canvas 180 degrees and work the next row right to left again.
- Switch to basketweave for big areas Work diagonal rows: one row going down, the next going up. Basketweave keeps large areas flat and square.
- End the thread On the back, weave the needle under about 1 inch of stitches, ideally of the same color, and trim close. Do not knot.
- Block the finished piece Dampen the canvas with water or steam, pin it face down on a board with the threads square, and let it dry flat away from sun. Drying can take a day or more.
Questions
Can you teach yourself needlepoint?
Yes. The basic tent stitch takes minutes to learn. Follow the steps above on a small 13-mesh piece and you will have the whole process down.
Do you need stretcher bars for needlepoint?
They are not required, but they help a lot. A canvas on bars stays square, distorts less and is easier to stitch with even tension. Many people stitch small ornaments in hand.
How do you start a thread in needlepoint without a knot?
Use a waste knot that you cut off later, or a loop start with an even number of floss strands. You can also run the tail under existing stitches on the back once some are in place.
Do you knot the end of needlepoint thread?
No. Weave the tail under about 1 inch of stitches on the back and trim it. Knots make lumps and can pull through the canvas.
What is the easiest needlepoint stitch for a beginner?
Continental tent stitch. It is worked in simple rows and gives full coverage. Learn basketweave next for backgrounds.